Information Technology Solutions

Set up VPN

VPN allows you to remotely access College resources that are not accessible outside of the corporate network. You can scroll through the Set up VPN web page or click directly on the topics below:


Connect to VPN with a College issued laptop

This process is to be used while working on a College issued laptop, where the Cisco Secure Client is already installed.
  1. Click the Cisco Secure Client icon cisco secure client icon (formerly Cisco AnyConnect Secure Mobility Client) in the system tray in the bottom right‑hand corner of your taskbar.
    click icon in system tray hidden icons

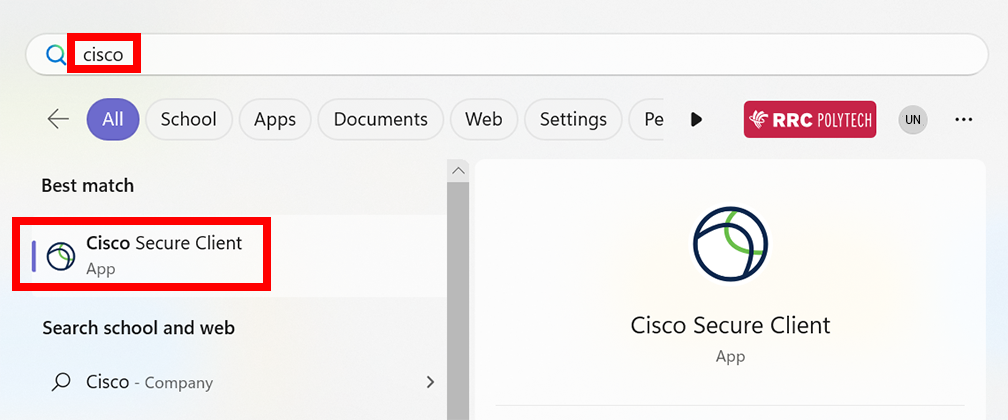
    NOTE: If the Cisco Secure Client icon does not appear in your system tray, type Cisco into your Windows search box and click the search result. You may also right-click the result and then pin it to your taskbar or to your Start menu.
    cisco search in windows search box
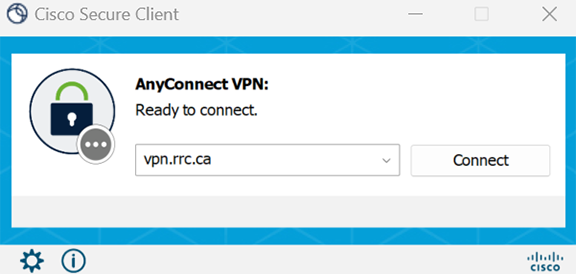
  2. On the Cisco Secure Client window, click Connect.
    click connect
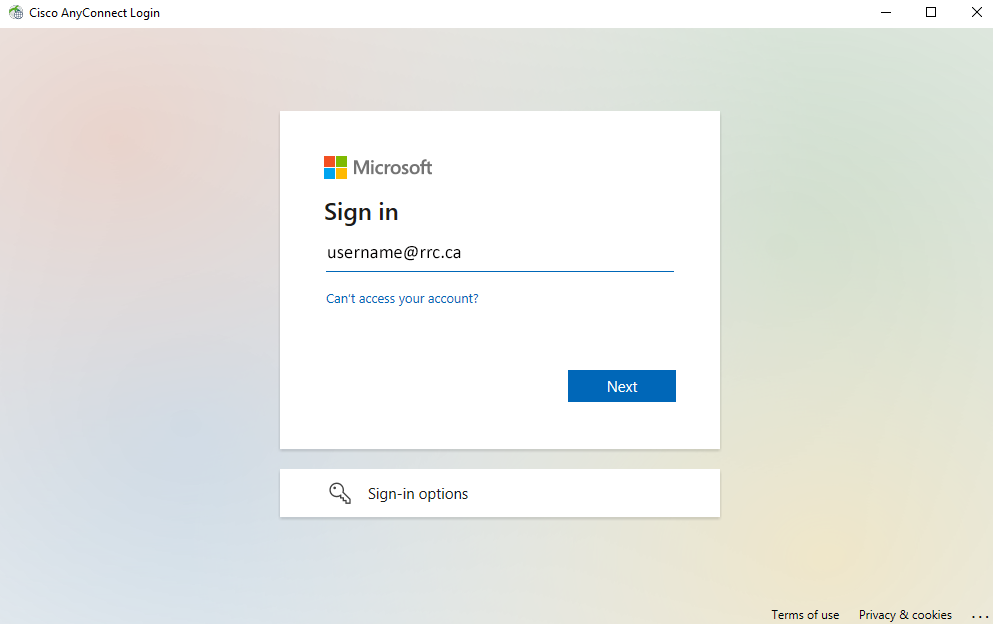
  3. Type in your College email address on the Microsoft sign-in page and click Next.
    click next
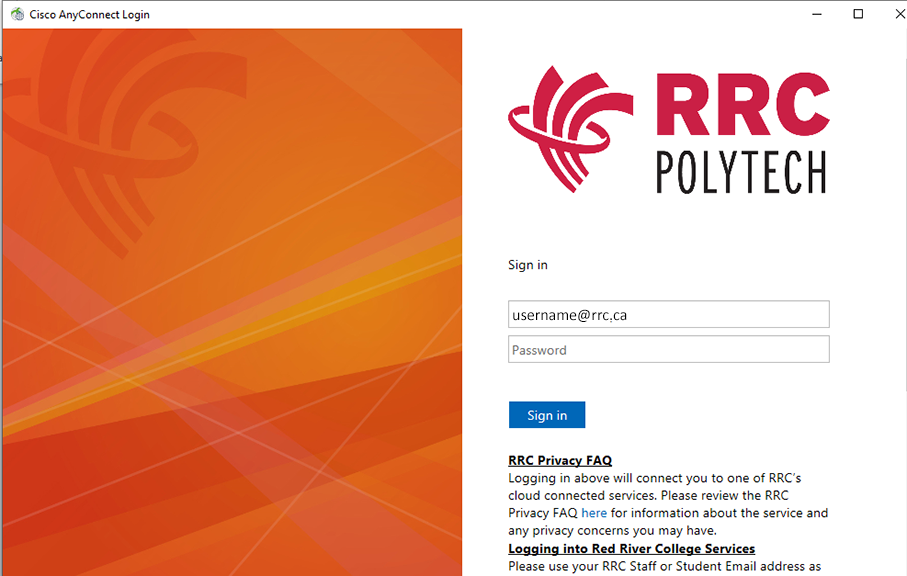
  4. On the RRC Polytech sign-in page, enter your College password, and then click Sign in.
    enter password and click Sign in
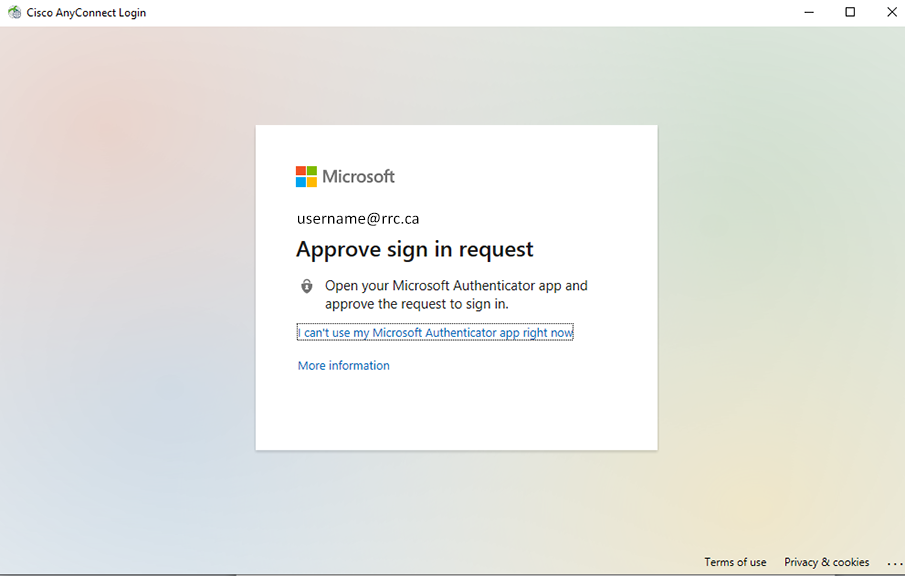
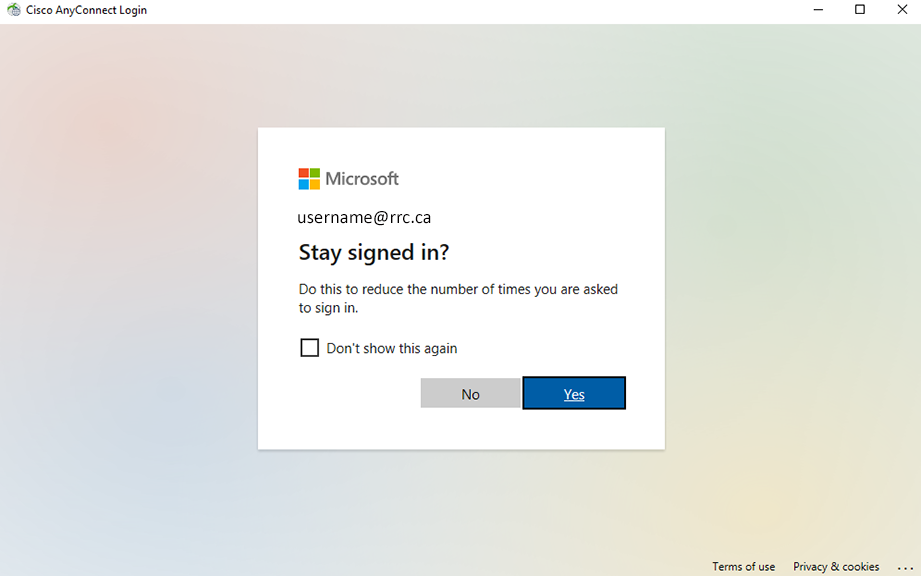
  5. On this Microsoft window, your College email address will default in.
    approve sign in request
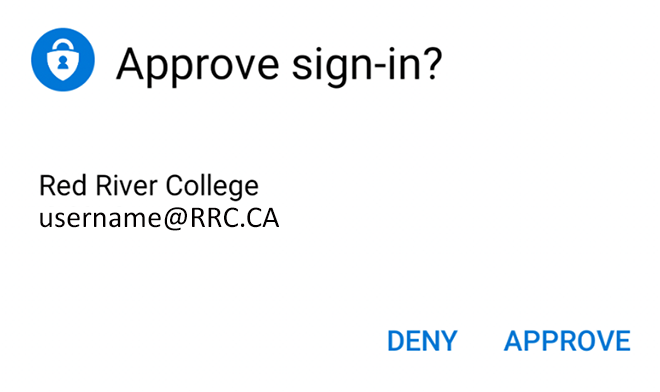
  6. You will receive this MFA prompt if you use a cell phone to authenticate. Click Approve.
    click approve
    NOTE: If you use Yubikey to authenticate, you will not receive this prompt.
  7. Click No.
    click no
  8. Read the security notice on the Cisco AnyConnect menu, click Accept, and you can begin using your VPN connection.

Access VPN with a non-College laptop

This process is to be used while working on a non-College issued laptop, where the Cisco Secure Client is not installed.

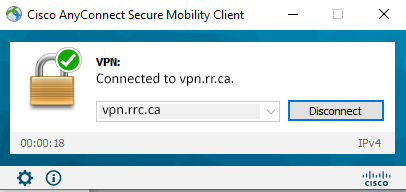
  1. Connect to the Internet, and then click RRC VPN to download and install the Cisco Secure Client.
  2. Enter your College username and password, and then click Login.
    VPN window

    NOTE: If you experience difficulty with the manual installation process, please open the ITS Service Desk website to submit a Service Desk ticket.

Disconnect from VPN

  1. Click the Cisco Secure Client icon cisco secure client icon (formerly Cisco AnyConnect Secure Mobility Client) in the system tray in the bottom right‑hand corner of your taskbar.
  2. On the Cisco Secure Client menu, click Disconnect.
    click disconnect

← Back to Virtual Private Network (VPN)

RRC Polytech campuses are located on the lands of Anishinaabe, Ininiwak, Anishininew, Dakota, and Dené, and the National Homeland of the Red River Métis.

We recognize and honour Treaty 3 Territory Shoal Lake 40 First Nation, the source of Winnipeg’s clean drinking water. In addition, we acknowledge Treaty Territories which provide us with access to electricity we use in both our personal and professional lives.

Learn more ›